- Setup JMRI
- Getting Started
- Using DecoderPro
- DecoderPro® Programming Modes
- The Basic Programmer
- The Comprehensive Programmer
Getting Started with DecoderPro®
How do I set up my preferences?
The current JMRI Preferences Help is here.
Click on the Edit menu and then Preferences... to open the Preferences window. On Mac OS X choose Preferences... from the DecoderPro application menu. (This window may open automatically the first time you run the program.)
As a first time user the most important information is the Connections screen where you describe how the computer will talk to the command station. Most of rest you can leave at the initial or "default" settings until you find a need to change things to suit your fancy.
Most importantly, you must click [Save] to finalize your settings and then re-start the program to have them take effect.
The Preferences panel provides access to the basic configuration information to connect your computer to your DCC system. You will be using that system to actually program and operate trains equipped with DCC decoders.
The panel is split into two panes: on the left side is a list of preference groups that may be set. Clicking on one of the items opens the options that may be set in the right side pane. The Connections tab was selected in the following screen shot:

| Connections | Allows you to select the system connection that you are using for controlling DCC and the connection to your computer. |
| Defaults | Shows system default settings |
| File Locations | Set default location for saving User files and Script Files |
| Start Up | Allows you to set Actions, Buttons, Files and Scripts that run at Start Up |
| Display | Allows you to select your computer display mode |
| Messages | Set default actions for system message when displayed |
| Roster | Allows you to set your default Programmer and roster location |
| Throttle | Allows you to set up you Throttle preferences |
| Wi Throttle | Allows you to set up a Wi Throttle settings |
| JSON Server | Opens JSON Server Prefence settings pane |
| WebServer | Sets up the Decoder Pro® WebServer |
Now we will set up preferences for the JMRI environment with your command station.
| I am using a Digitrax Super Chief Command Station (radio) interfaced to the computer via LocoNet, PR3 (MS100 mode) and USB port. I keep master roster on the System Drive. |
Start Up
Start Up preferences allow windows and files to be opened, scripts to be run, and additional buttons to be placed on the main window when the application starts.
Click the Add ▾ button and select the type of start up action to add. The new action will be added last.
Start up action order is important. In most cases, scripts should be the last items in the start up order. Start up order can be changed by selecting a start up item and moving it up or down in the list.
Display Panes
GUI Tab
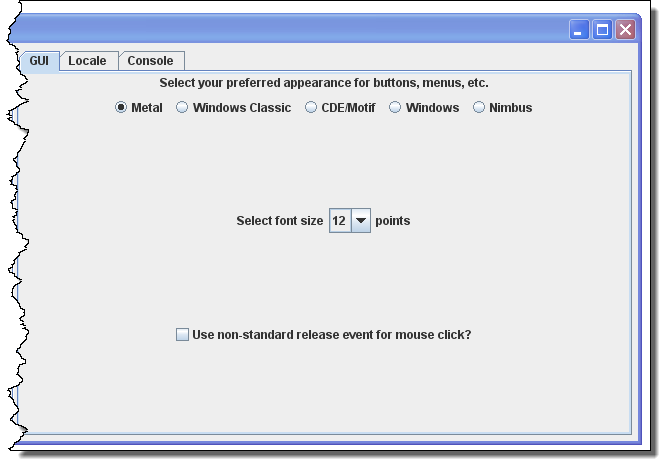
| Select your preferred appearance for buttons, menus, etc. | Metal |
| Windows Classic | |
| CDE/Motif | |
| Windows | |
| Nimbus | |
| Select font size in points | Select font size [12] points |
| If you experience clicks not working, select | Use non-standard release event for mouse click? |
Locale Tab
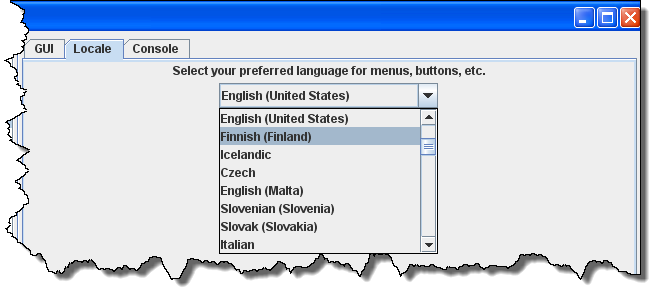
Drop-down list to select your location and language
Console Tab
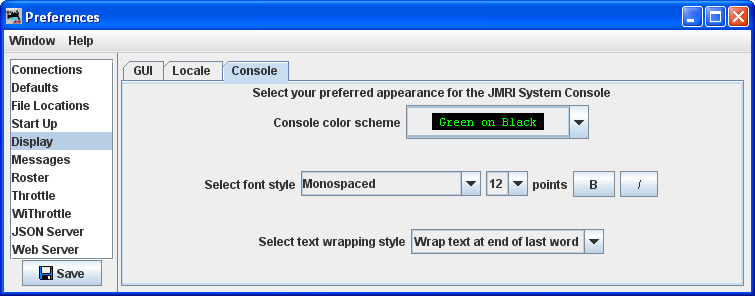
Display settings for the JMRI System Console.
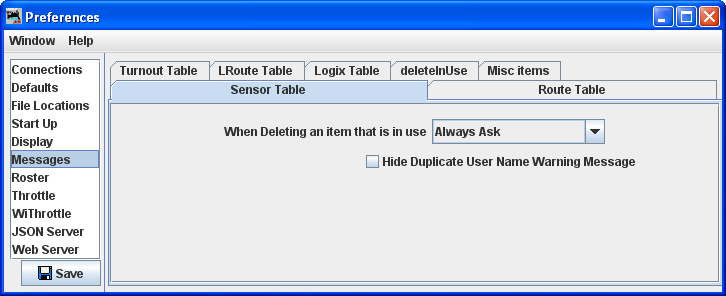
Messages Panes
The Tabs and selections can be used to set how and when messages are displayed.
Roster Panes
Programmer pane
Used to set the preferred decoder programmer.
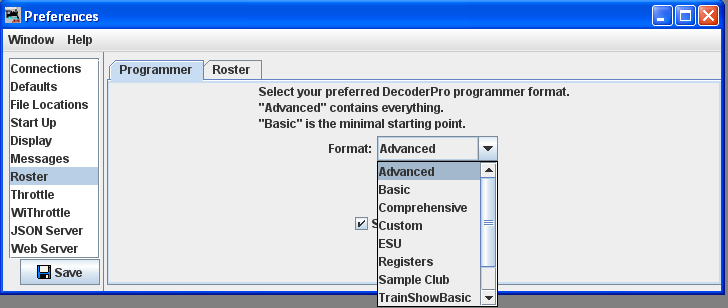
Roster Pane
You may set the default location of the locomotive roster and the default owners name.
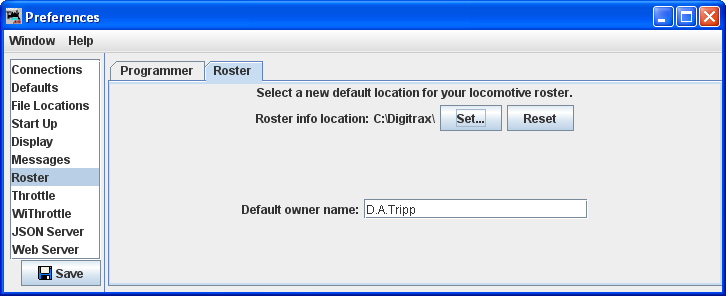
Note that I do not use the default roster file location. This location is a Network accessible location for my three systems and WiFi connection.
Throttle Pane
Select throttle startup conditions, shown are defaults, but you may change the settings.
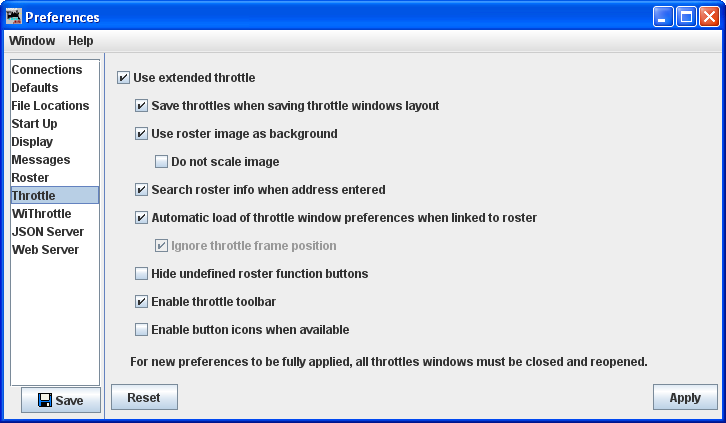
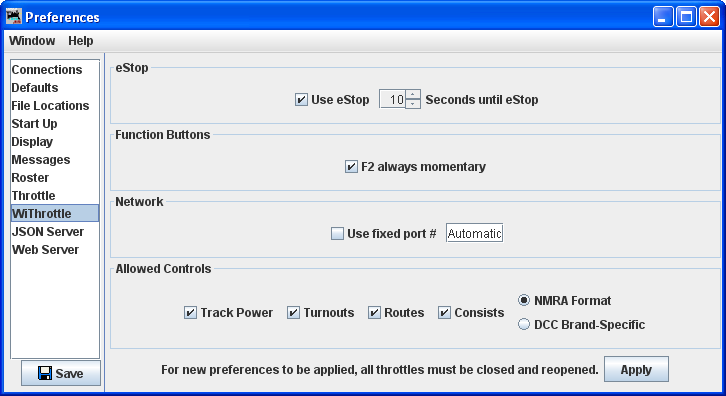
WiThrottle Pane
This pane allows WiThrottle users to customize the setup.
JSON Server Pane
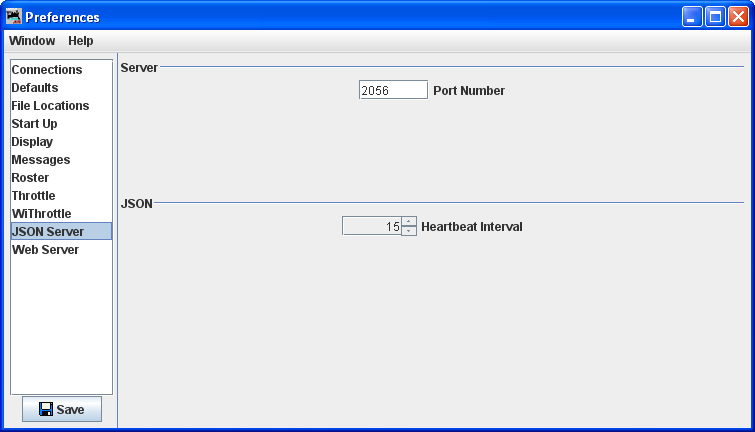
Web Server Pane
Use this pane to set up MiniServer if you are using it.
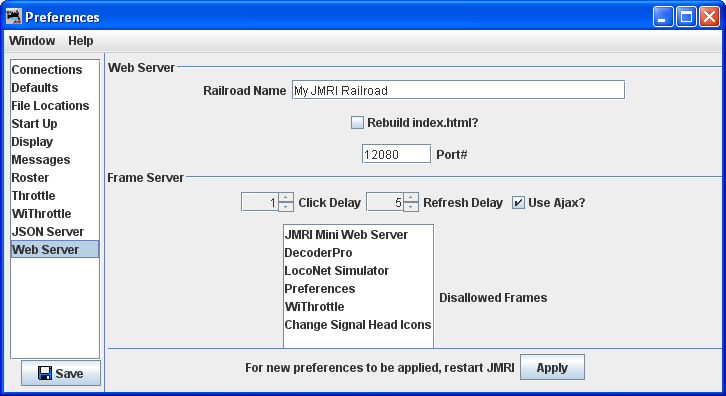
Before you exit the Preferences, click the [Save] button to save all your
selections.
You must restart DecoderPro for Preferences to take effect.