Edit Block Window
The Edit Block pane allows you to edit the following tabs:
Basic
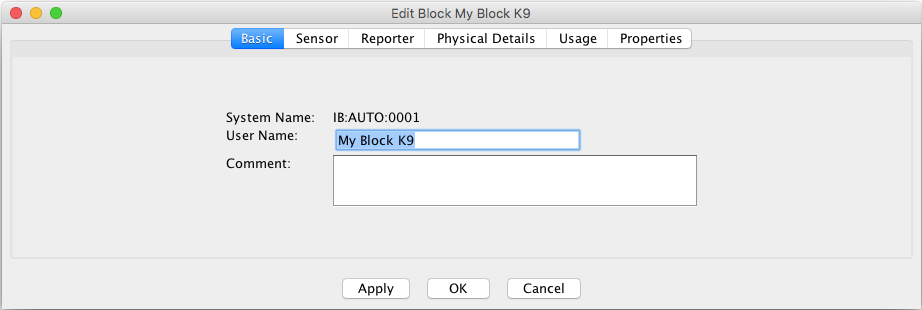
This provides basic information about the Block, as entered on its creation:
-
System Name - The system name of the Block. There is no functional requirement for a type letter in the System Name of a Block, but by convention we use 'B' for 'Block'. The default implementation is not system-specific, so a system letter of 'I' is appropriate. This leads to system names like "IB201".
-
User Name - The user name of the Block. The user name of a Block created here may be set to any text. Before changing or removing a block user name, a check is made to see if the user name is used by a Layout Editor panel. If so, a warning is displayed. For changing the user name, if Yes is selected, the panel references will also be changed.
-
Comment - You may enter any text in this field that will help you distinguish this Block from other Blocks, or provide useful notes about its use.
Sensor
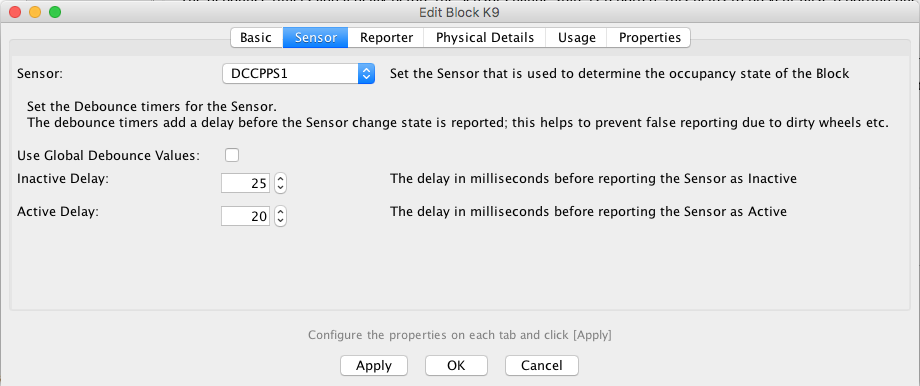
This tab allows you to assign a Sensor to the Block to change the occupancy state. It also allows certain information about the Sensor to be changed:
-
Sensor Select the Sensor from the drop down list that will be associated with this Block.
- You can edit the Sensor Debounce options from this tab; setting the Sensor Debounce helps to prevent false triggers of a Sensor being passed into the system and triggering other events in the system. Such false triggers could be due to a dirty piece of track or electrical interference.
The Use Global Debounce Values check box, allows you to select if the sensor will use the default sensor debounce values if configured.
Inactive Delay and Active Delay allow you to specify the amount of time in milliseconds that the system waits before registering the state change of a sensor.
Reporter

-
Reporter Set the Reporter assigned to this Block. See the Reporter Table. Selecting a Reporter and clicking Apply puts the Reporter Value into the Block value.
-
Use Current If we consider the scenario whereby we want to track a train
around the layout, this is achieved by assigning the reporter to the blocks.
Until the train is known, we have nothing to track. Typically, we can
manually type in the Train ID into a panel and then this is tracked around the layout
based on Block occupancy. If, however, we have an attached device that can provide us
with the Train ID, such as an RFID reader, we no longer need to manually type in the
Train ID - the reader does this for us. In essence, the reader is little more than an
'intelligent' sensor - not only can it sense that 'something' is there, it can tell us
which something it is. Now to the implementation. A Sensor is purely ACTIVE or INACTIVE -
i.e. something is there or it isn't. A Reporter, however, can tell us one of the
following:
- 'Hey, I'm seeing something right now - this is it'
- 'Hmm, I'm not seeing anything right now'
- 'Hey, I saw something a while back - this was it'
- 'Hmm, I've not seen anything yet'
Physical Details
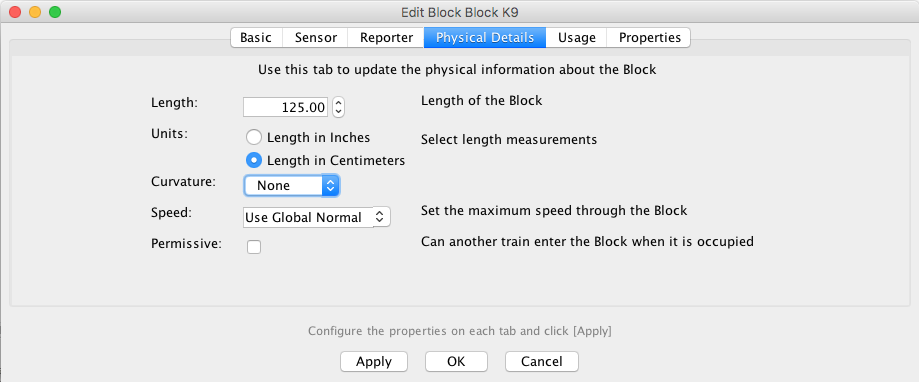
Describe the geometry of the Block using the fields shown.
|
|
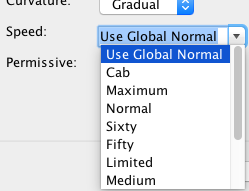
Speed options:
|
- Length (optional) - Displays the length of the Block. Optionally, you may enter the length of the Block here. The length is used for automatic running of trains. If '0.0' is displayed, the length has not been entered. The entered length should be the actual length of the Block on the model railroad layout. Length is entered and displayed in either inches or centimeters, depending on which unit is next in the Block Table.
- Units - Choose one of both as the unit for the Block Length
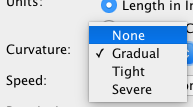
- Curvature (optional) - Displays the curvature selected for the track in the Block. Curvature is used for automatic running of trains, and need not be entered if trains will not be run automatically. Curvature, if present, indicates to the computer that it should slow the train as it runs through the Block. If None or Gradual are selected, an automatic train will proceed at normal speed. Tight should be selected if the train should slow down some; Severe should be selected if the train should slow by a maximum amount. If the Block has variable curvature, your selection should be made according to the most limiting part of the Block.
- Speed - The speed is used with certain automation tools and logic, to
help determine the speed at which a train can be set through the block. It is also used by
the Signal Mast Logic for determining which Aspect should be displayed in a signal
path.
In the drop down list, you are presented a set of named fixed speeds that have been predefined in the signalSpeed.xml file, in addition to a global option.
It is also possible to enter a numerical value to represent a speed. The global value is set via the Speeds menu option. - Permissive - The Permissive option is used to identify Blocks that can be entered by another Train while it is already occupied. This option is used with certain automation tools and Logix to help determine if a Train can enter an occupied Block and what Aspect should be displayed on its Signal Mast.
- Ghost - The Ghost option is used by Dispatcher to simulate block occupancy for blocks that don't have real occupancy sensors.
Usage
This is an information field, showing where you have the Block displayed on a Panel:

Properties

More information on using Blocks with Layout Editor
Back to the Block Table Help page.
Thanks and congratulations to all who contributed! Contact us via the JMRI users Groups.io group.
Copyright © 1997 - 2024 JMRI Community. JMRI®, DecoderPro®, PanelPro™, DispatcherPro™, OperationsPro™, SignalPro™, SoundPro™, LccPro™, TrainPro™, Logix™, LogixNG™ and associated logos are our trademarks. Additional information on copyright, trademarks and licenses is linked here.
View the